Programming through software
- Open Back-up unit data file from the PC
- Save..
- Save as..
- Select connection COM 1-16, IP or Modem
- Make connection to the unit
- Select language
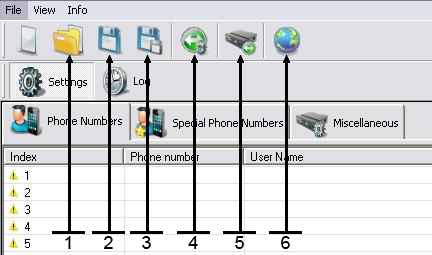
Control the XR unit via RS232, Modem or IP (IP as from XR version 2.1.6)
- To select the connection, push the phone icon number 4 on the top image.
- Select RS232 COM port from 1-16, IP or Modem for CSD connection.
- To make a connection, push the icon number 5 on the top image.
- To select different language, push the icon number 6 on the top image.
- To save all unit data for backup, push the icon number 2 on the top image.
- To open backup unit data, push the icon number 1 on the top image.
NOTICE: When the software is connected to the XR, the unit will not respond to an incoming call.
Add phone numbers
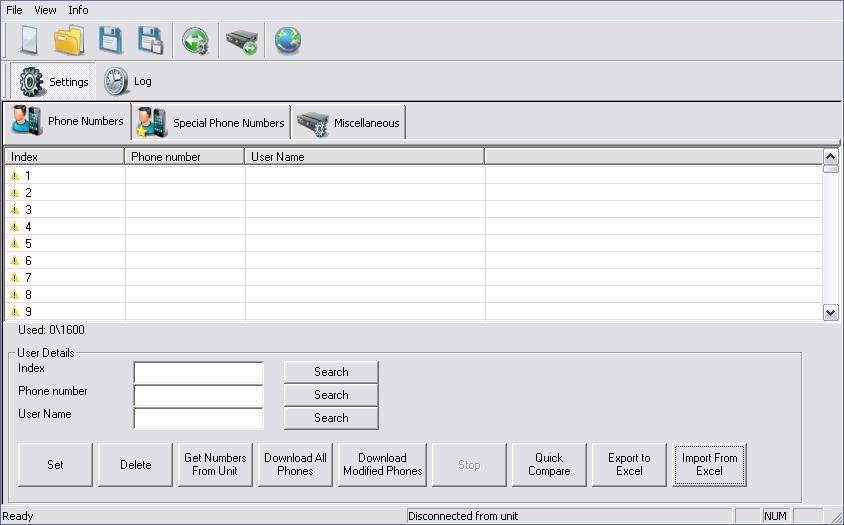
- At this page enter all regular phone numbers that will activate the XR unit.
- Those phone numbers don’t have time or date limitation.
- The list can hold 1600 phone numbers.
- To load new phone number use the 3 blank boxes USER DETAILS.
- After enter a phone number klick on SET. The new user is now on the list.
- To load long list of phone numbers and user names use INPORT FROM EXCEL box icon, to make first time excel file use EXPORT TO EXCEL, this way the basic file with all column will be shown.
- To compare the phone number list that are in the XR unit to the list on the PC, use QUICK COMPARE box icon.
- When new phone number enter to the software list on the index will appear the phone number with yellow marker, after loading the number to the XR unit the index marker will change to green.
- The GET PHONE NUMBERS FROM UNIT box icon, allow to get phone numbers that are stored on the XR unit. When all numbers are green the process can be paused by clicking the STOP button.
- When looking for phone number or user name on the list, use the search boxes icon.
- Pay attention on the lower right side of this page there is massage box that displays the software to XR unit connection status: DISCONNECTED FROM UNIT or CONNECTED TO UNIT.
Add special phone numbers
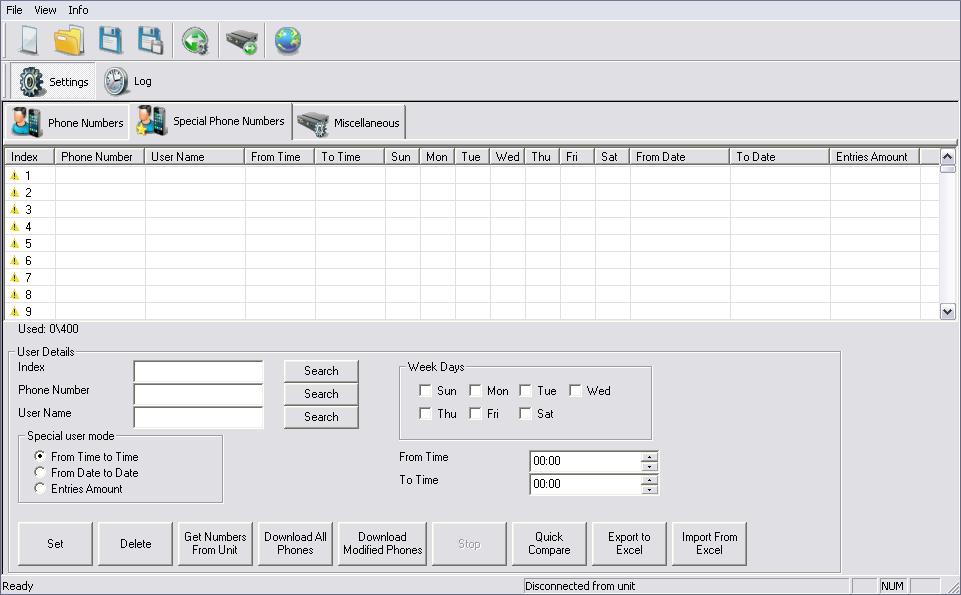
- At this page enter all special phone numbers that will activate the XR unit.
- Those phone numbers will have time or date limitation.
- The list can hold 400 phone numbers.
- To load new phone number use the 3 blank boxes on the lower left side of the page, then select what kind of limitation this phone number will have, there are 3 options: FROM TIME TO TIME, FROM DATE TO DATE, ENTERY AMOUNT. For the FROM TIME TO TIME fill the week day and the time boxes. For the FROM DATE TO DATE file the date to date boxes. For the ENTERIES AMOUNT file the number of entries box.
- To load a long list of phone numbers and user names use INPORT FROM EXCEL box icon, to first time excel file use EXPORT TO EXCEL, this way the basic file with all columns will be shown.
- When a new phone number is entered to the list, it will appear with a yellow marker, after loading the number to the XR unit the index marker will change to green.
- To load new phone numbers to the XR unit use the SET box icon. The new user is now on the list.
Miscellaneous
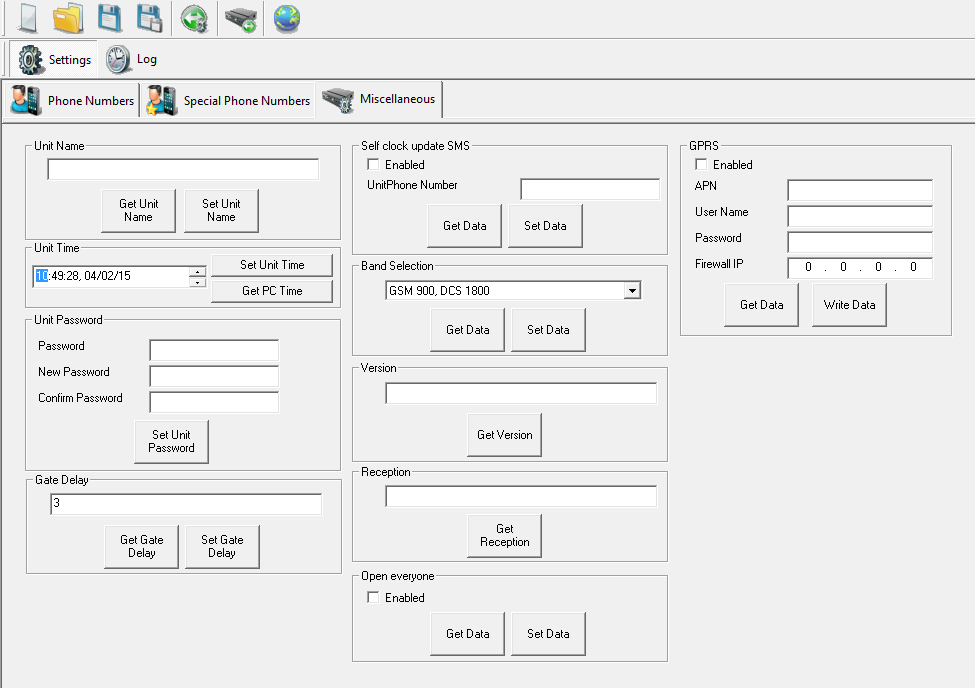
- At this page set all miscellaneous options that will activate the XR.
- UNIT NAME, for multi gate user, each unit has a name.
- UNIT TIME, set time for special phone numbers and log.
- UNIT PASSWORD, change unit password, same password apply to SMS RS232 or CSD connection.
- SELF CLOCK UPDATE SMS, on unit power up, unit can get the time from self SMS, fill the SIM number on the unit to this box.
- BAND SELECTION, 4 options for band selection for EUROPE and North America.
- VERSION, get unit software version.
- RECEPTION, get unit reception level under 30% will consider low level, try to improve GSM antenna location for better reception.
- GATE DELAY, unit set to 3 second normally, for different time delay set this box.
- OPEN EVERYONE, enables acces to everyone who calls the unit
IP configuration (as from XR version 2.1.6)
- GPRS: Here you can enter the data for IP connection with the unit. Check with your provider for the following information and enter it here: APN and possible user name and password. Let “Firewall IP” in most cases be default 0.0.0.0.
- Press ”write data”
- Restart the unit by disconnecting the power or by pressing the reset button.
- Send – once the unit is restarted – an SMS to the unit with P.1234IP?
- You can now connect through IP by entering the just received IP address into the “communication selection” window.
Log
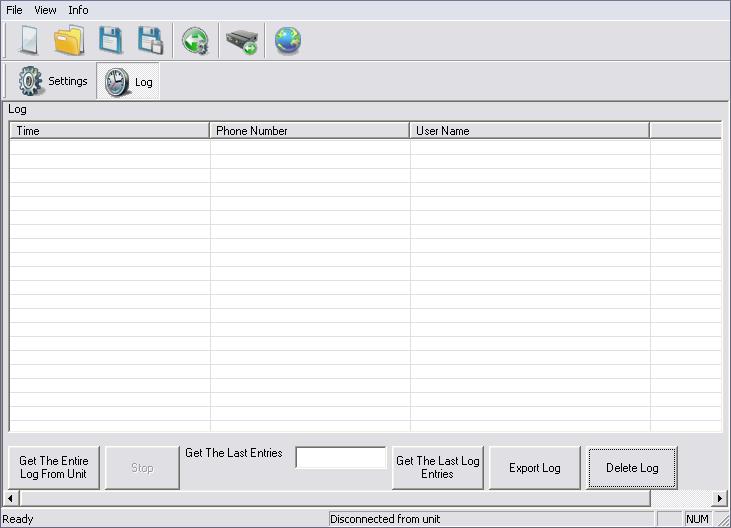
- At this page each call will be registered for log report.
- Log can be exported to excel file.
- Unit can save 1000 log lines.